Object-Based Mixing
Fulcrum One supports building full Object-Based Mixing systems using Fulcrum's Venueflex multi-function audio processors. Using proprietary gain and delay object placement algorithms, a sound source can be virtually positioned in either 2D or 3D space and rendered to a loudspeaker system of any scale.
One includes tools to create sound objects, manage them in a familiar live control environment, and automate their behavior through external control and tracking integrations. This guide will walk you through the process of setting up and using Object-Based Mixing in Fulcrum One. We recommend reviewing the Design Guide for Immersive Systems for an overview of designing a system for object-based mixing.
Rendering
Any loudspeaker in your One project can be configured for object-based mixing. Due to the nature of the Fulcrum panning algorithm, systems can be made to support nearly arbitrary loudspeaker layouts, depending on the spatial rendering requirement of the application. This includes:
- Stage-front systems of multiple loudspeakers or arrays recreating sources on a stage plus associated fill and delay loudspeakers.
- Surround-type horizontal loudspeaker systems producing 360-degree audio.
- Overhead or spherically-placed systems for rendering audio objects with height information.
Each source may be rendered in either two dimensions (for music or theatrical reinforcement applications) or three dimensions (for effects or VR applications). Options are provided to tailor the loudspeaker rendering and mixing for different applications or for speakers covering different areas of the audience. Various system designs can be employed and adapted based on the application requirements. For OBM sound sources, the level and delay to each loudspeaker is calculated based on the precise position and orientation of each loudspeaker in the One model. Therefore, it is important that this data be accurately represented in the One project.
OBM Settings
The project's Settings screen contains a number of controls for Object-Based Mixing. These settings are global and affect the entire rendered audio scene unless overridden by individual loudspeaker settings. Note that the default settings are typically successful for most applications.
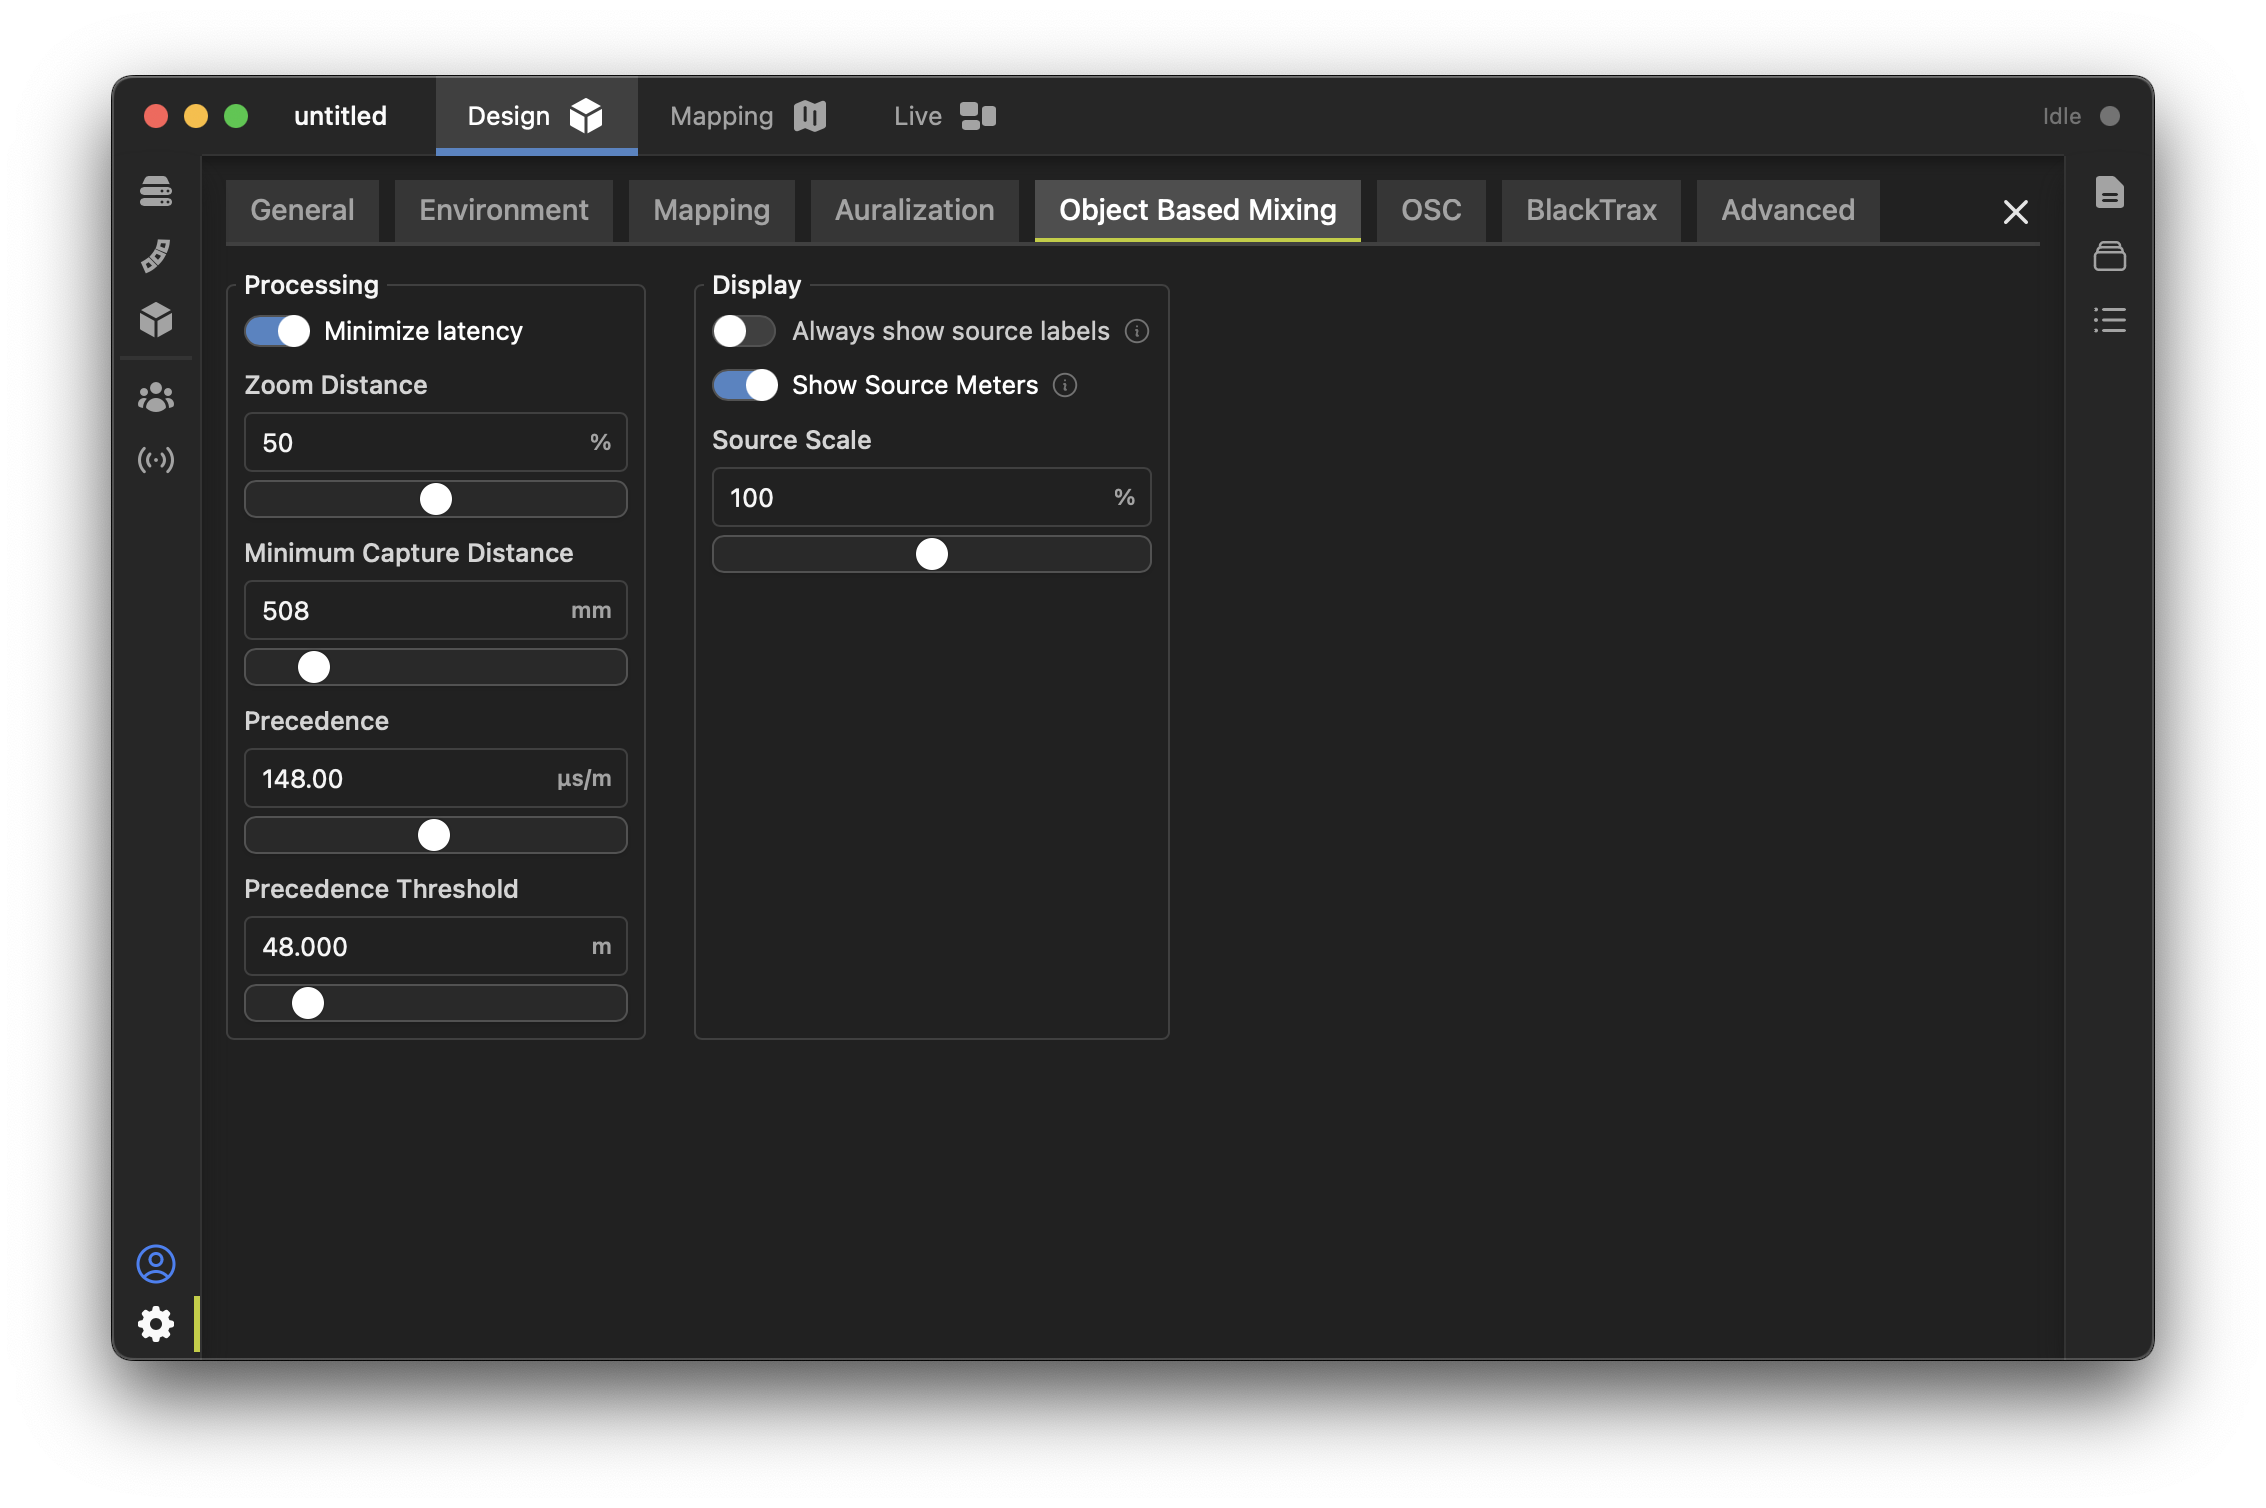
Processing Settings
- Minimize Latency: When this option is enabled, it will minimize the latency of the source delays regardless of position. When disabled, the real propagation delay of the source is built into the sound path (useful for limited cases in theatrical or VR audio).
- Zoom Distance: Modifies the volume level of the sound versus distance. A value of 0% reflects "real" source drop-off (best for limited theatrical uses or VR audio). A value of 100% "compresses" the volume space to no drop-off over distance (values close to this are best for music mixing minimizing variations per seat).
- Speaker Image Width: Modifies the ability for sources away from the center axis of each loudspeaker to be rendered. A value of 0% causes sources to be rendered most strongly when directly behind the loudspeaker. A value of 100% means sources can be rendered at any angle relative to the loudspeaker. A high value can be used to soften the rendering for loudspeaker arrays with a convex fan shape, or for fill speakers in wide rooms or other special situations.
- Allow Interior Sources: When enabled, an attempt is made to render sources that are located completely "inside" the loudspeaker array, useful for entertainment applications or effects. When disabled, sources completely inside the array are muted (typical for music mixing).
- Minimum Capture Distance: At distances underneath this value, a loudspeaker "captures" the source and the level does not increase further.
- Precedence: Adds additional time delay per distance to encourage the precedence effect for delay fill loudspeakers when a loudspeaker is further than a preset threshold from the source.
- Precedence Threshold: The threshold of distance above which the system adds the precedence delay time.
Display Settings
- Always Show Source Labels: When enabled, all source names are always shown in the Live tab. When disabled, only the selected source shows a name.
- Show Source Meters: Enable or disable signal level meters on the source in the Live tab.
- Source Scale: Changes the size of the sources shown in the Live tab.
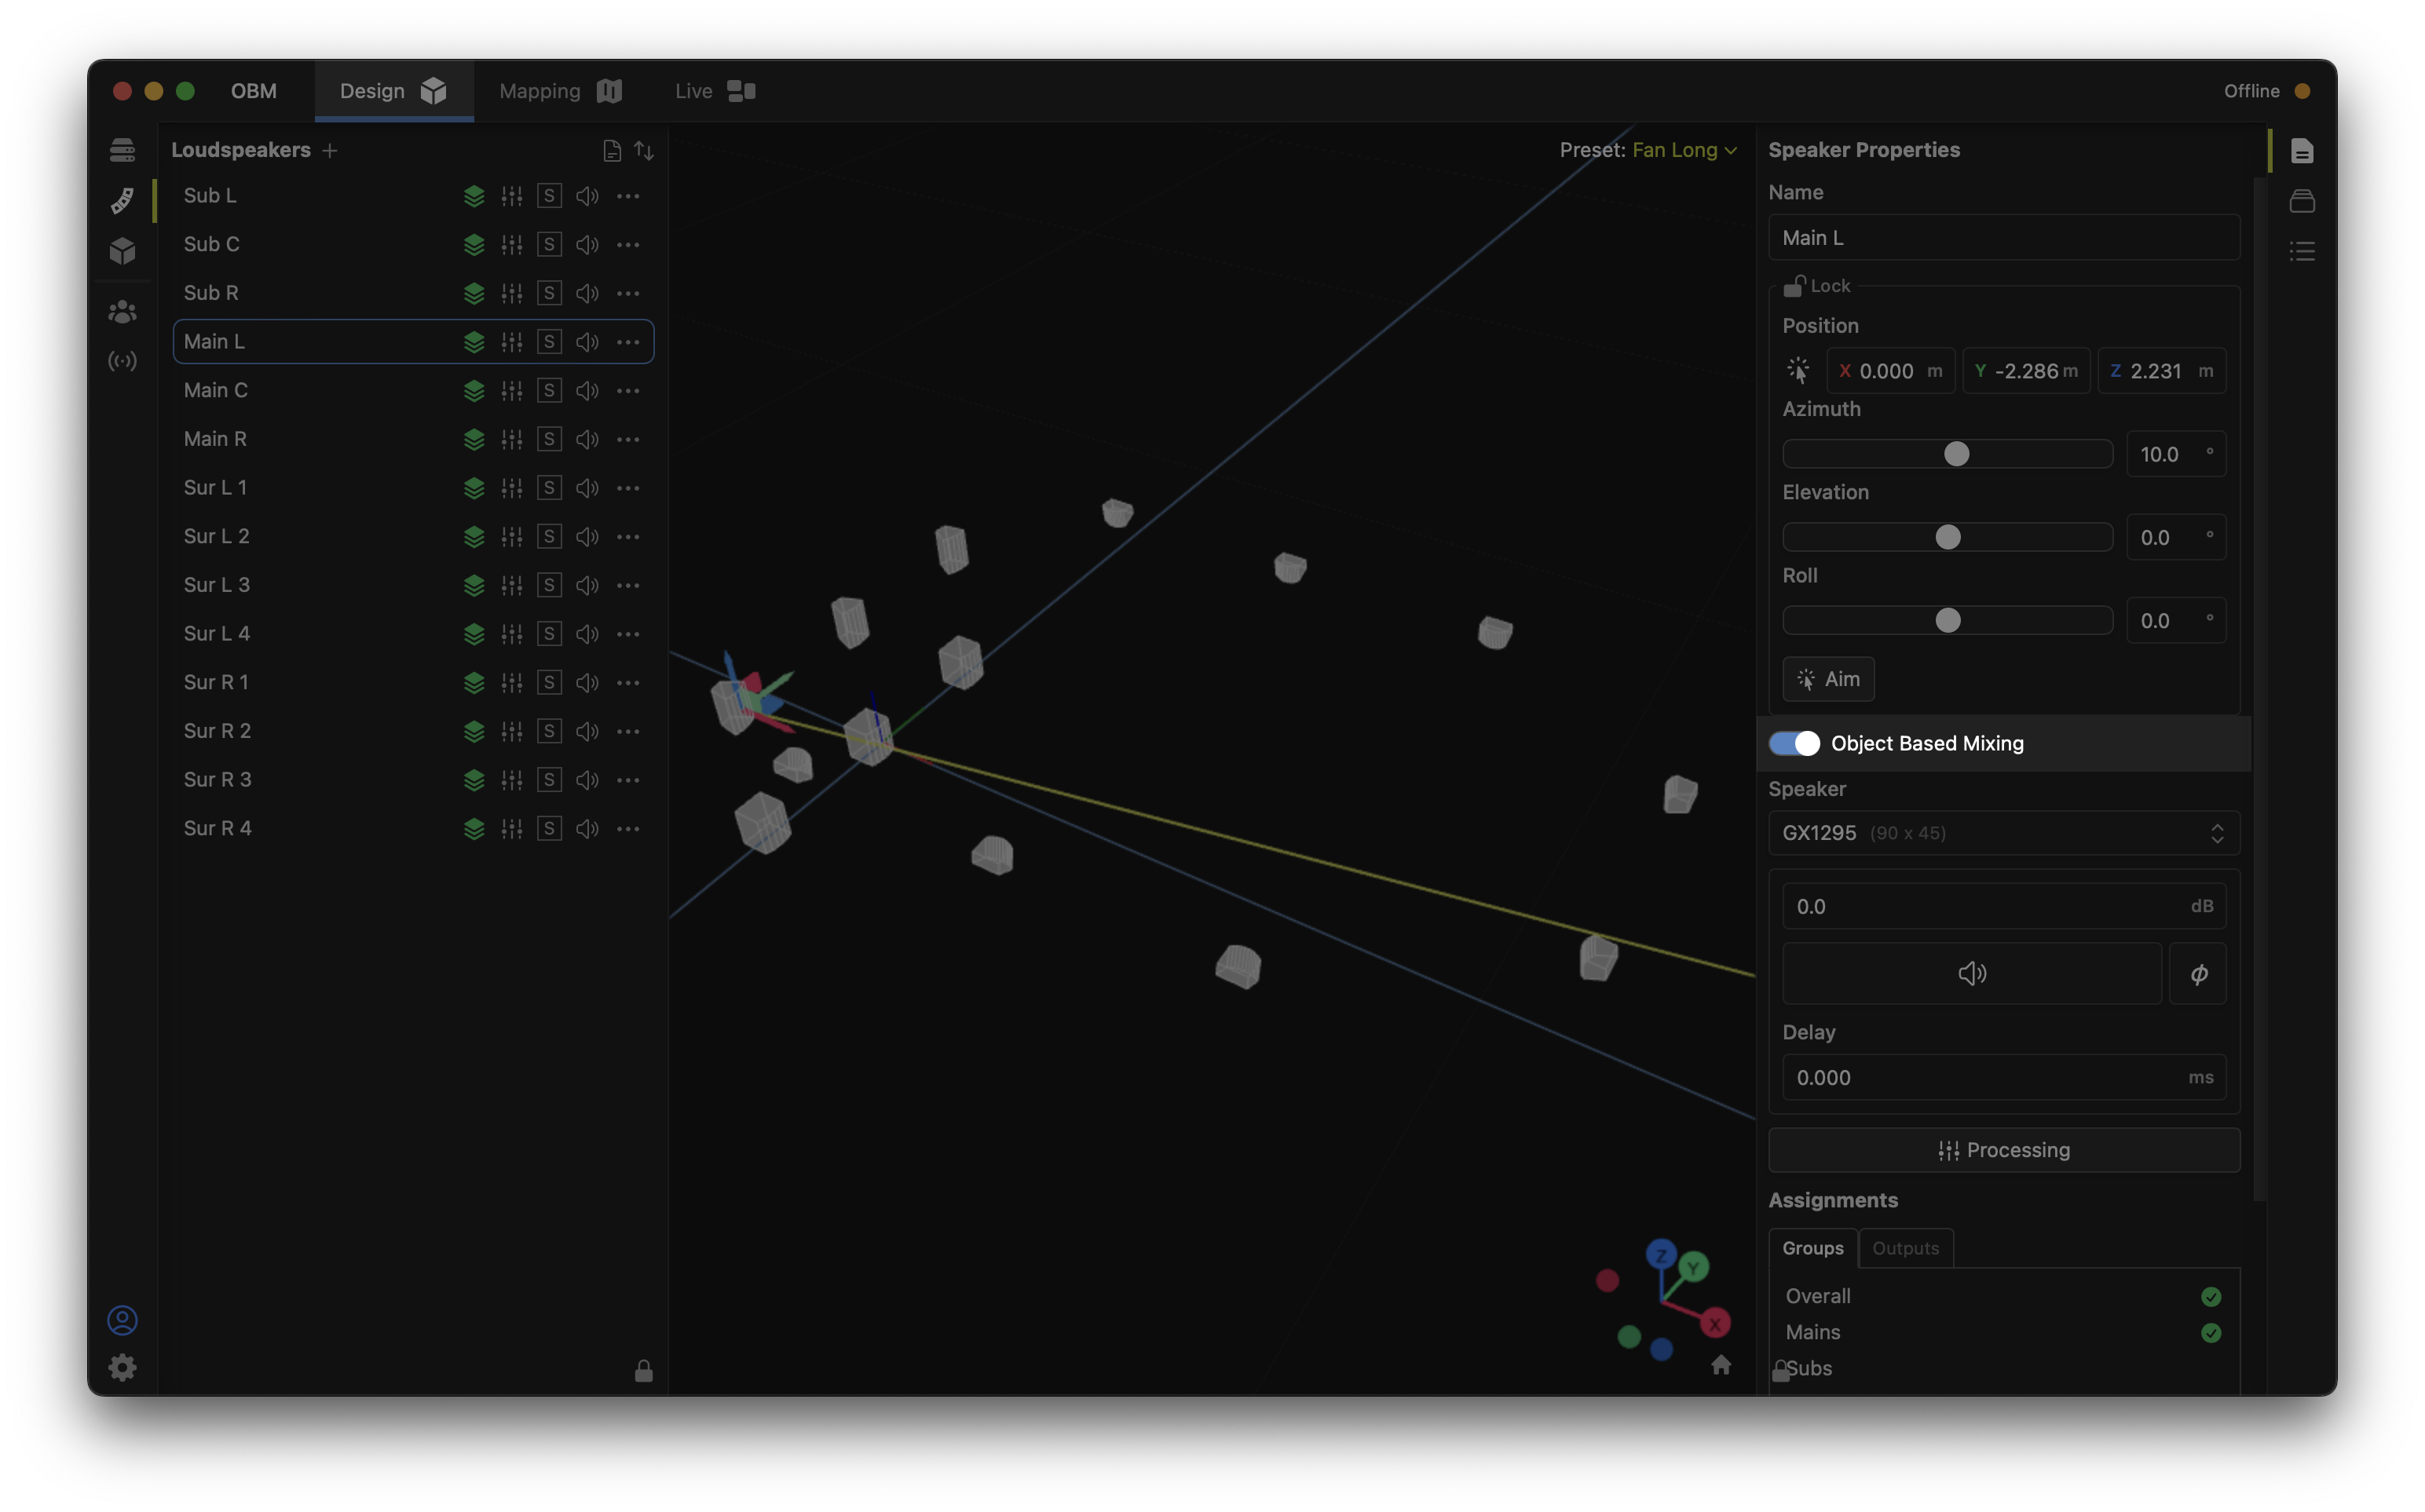
Configuring Loudspeakers for OBM
Any loudspeaker in the One project may join the OBM rendering engine by simply toggling the "Object Based Mixing" toggle switch in its property window:
To output audio from a physical processor channel, these loudspeakers must then be patched to a physical output. Note any mix matrix crosspoints common between those outputs and OBM object sources (below) will become managed by the OBM system, but other non-OBM inputs can still be manually controlled.
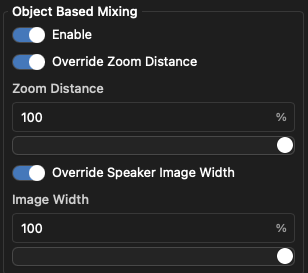
For special loudspeaker configurations such as fill or delay speakers, the OBM rendering parameters may be individually overridden for selected loudspeakers by enabling the "Override Zoom Distance" and/or "Override Speaker Image Width" options in the speaker properties window. Higher values may be desired for fill or delay speakers versus the overall system, which can enhance the continuity of the mix in affected seating areas. Groups of speakers may be set using multi-select.
Configuring OBM Inputs and Sources
In Fulcrum One, a sound object consists of a Source, which is placed in the 3D world and connected to a physical Input on a processor. Open the OBM workspace by clicking the  icon on the left. To add a source, click the "+" icon on the Sources list.
 icon on the left. To add a source, click the "+" icon on the Sources list.
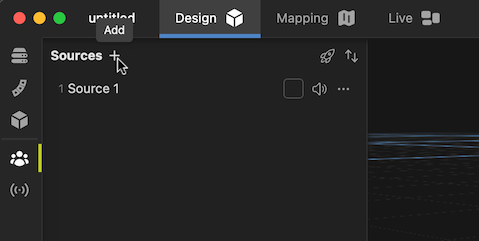
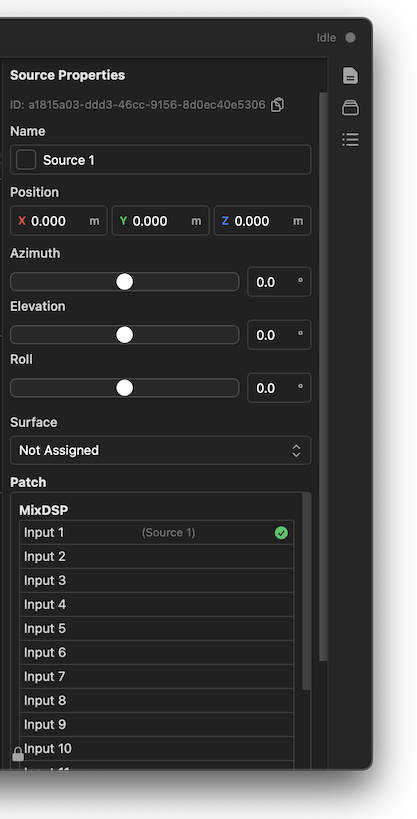
Upon selecting a source, its properties are available in the Properties toolbox on the right. This includes configuration options for the source allowing it to be renamed, color-coded, positioned, assigned to a mix surface (more later) and patched to a physical input. In addition, the source level in the mix can be adjusted, and its contribution to the individual active acoustics spaces can be controlled.
While sources can be manually added and configured as above, this process can be accelerated by using the source setup wizard, which can populate the source-to-input connections as well as facilitate the copying of names between sources and inputs. Click the  icon to open the Source Setup Wizard dialog box.
 icon to open the Source Setup Wizard dialog box.
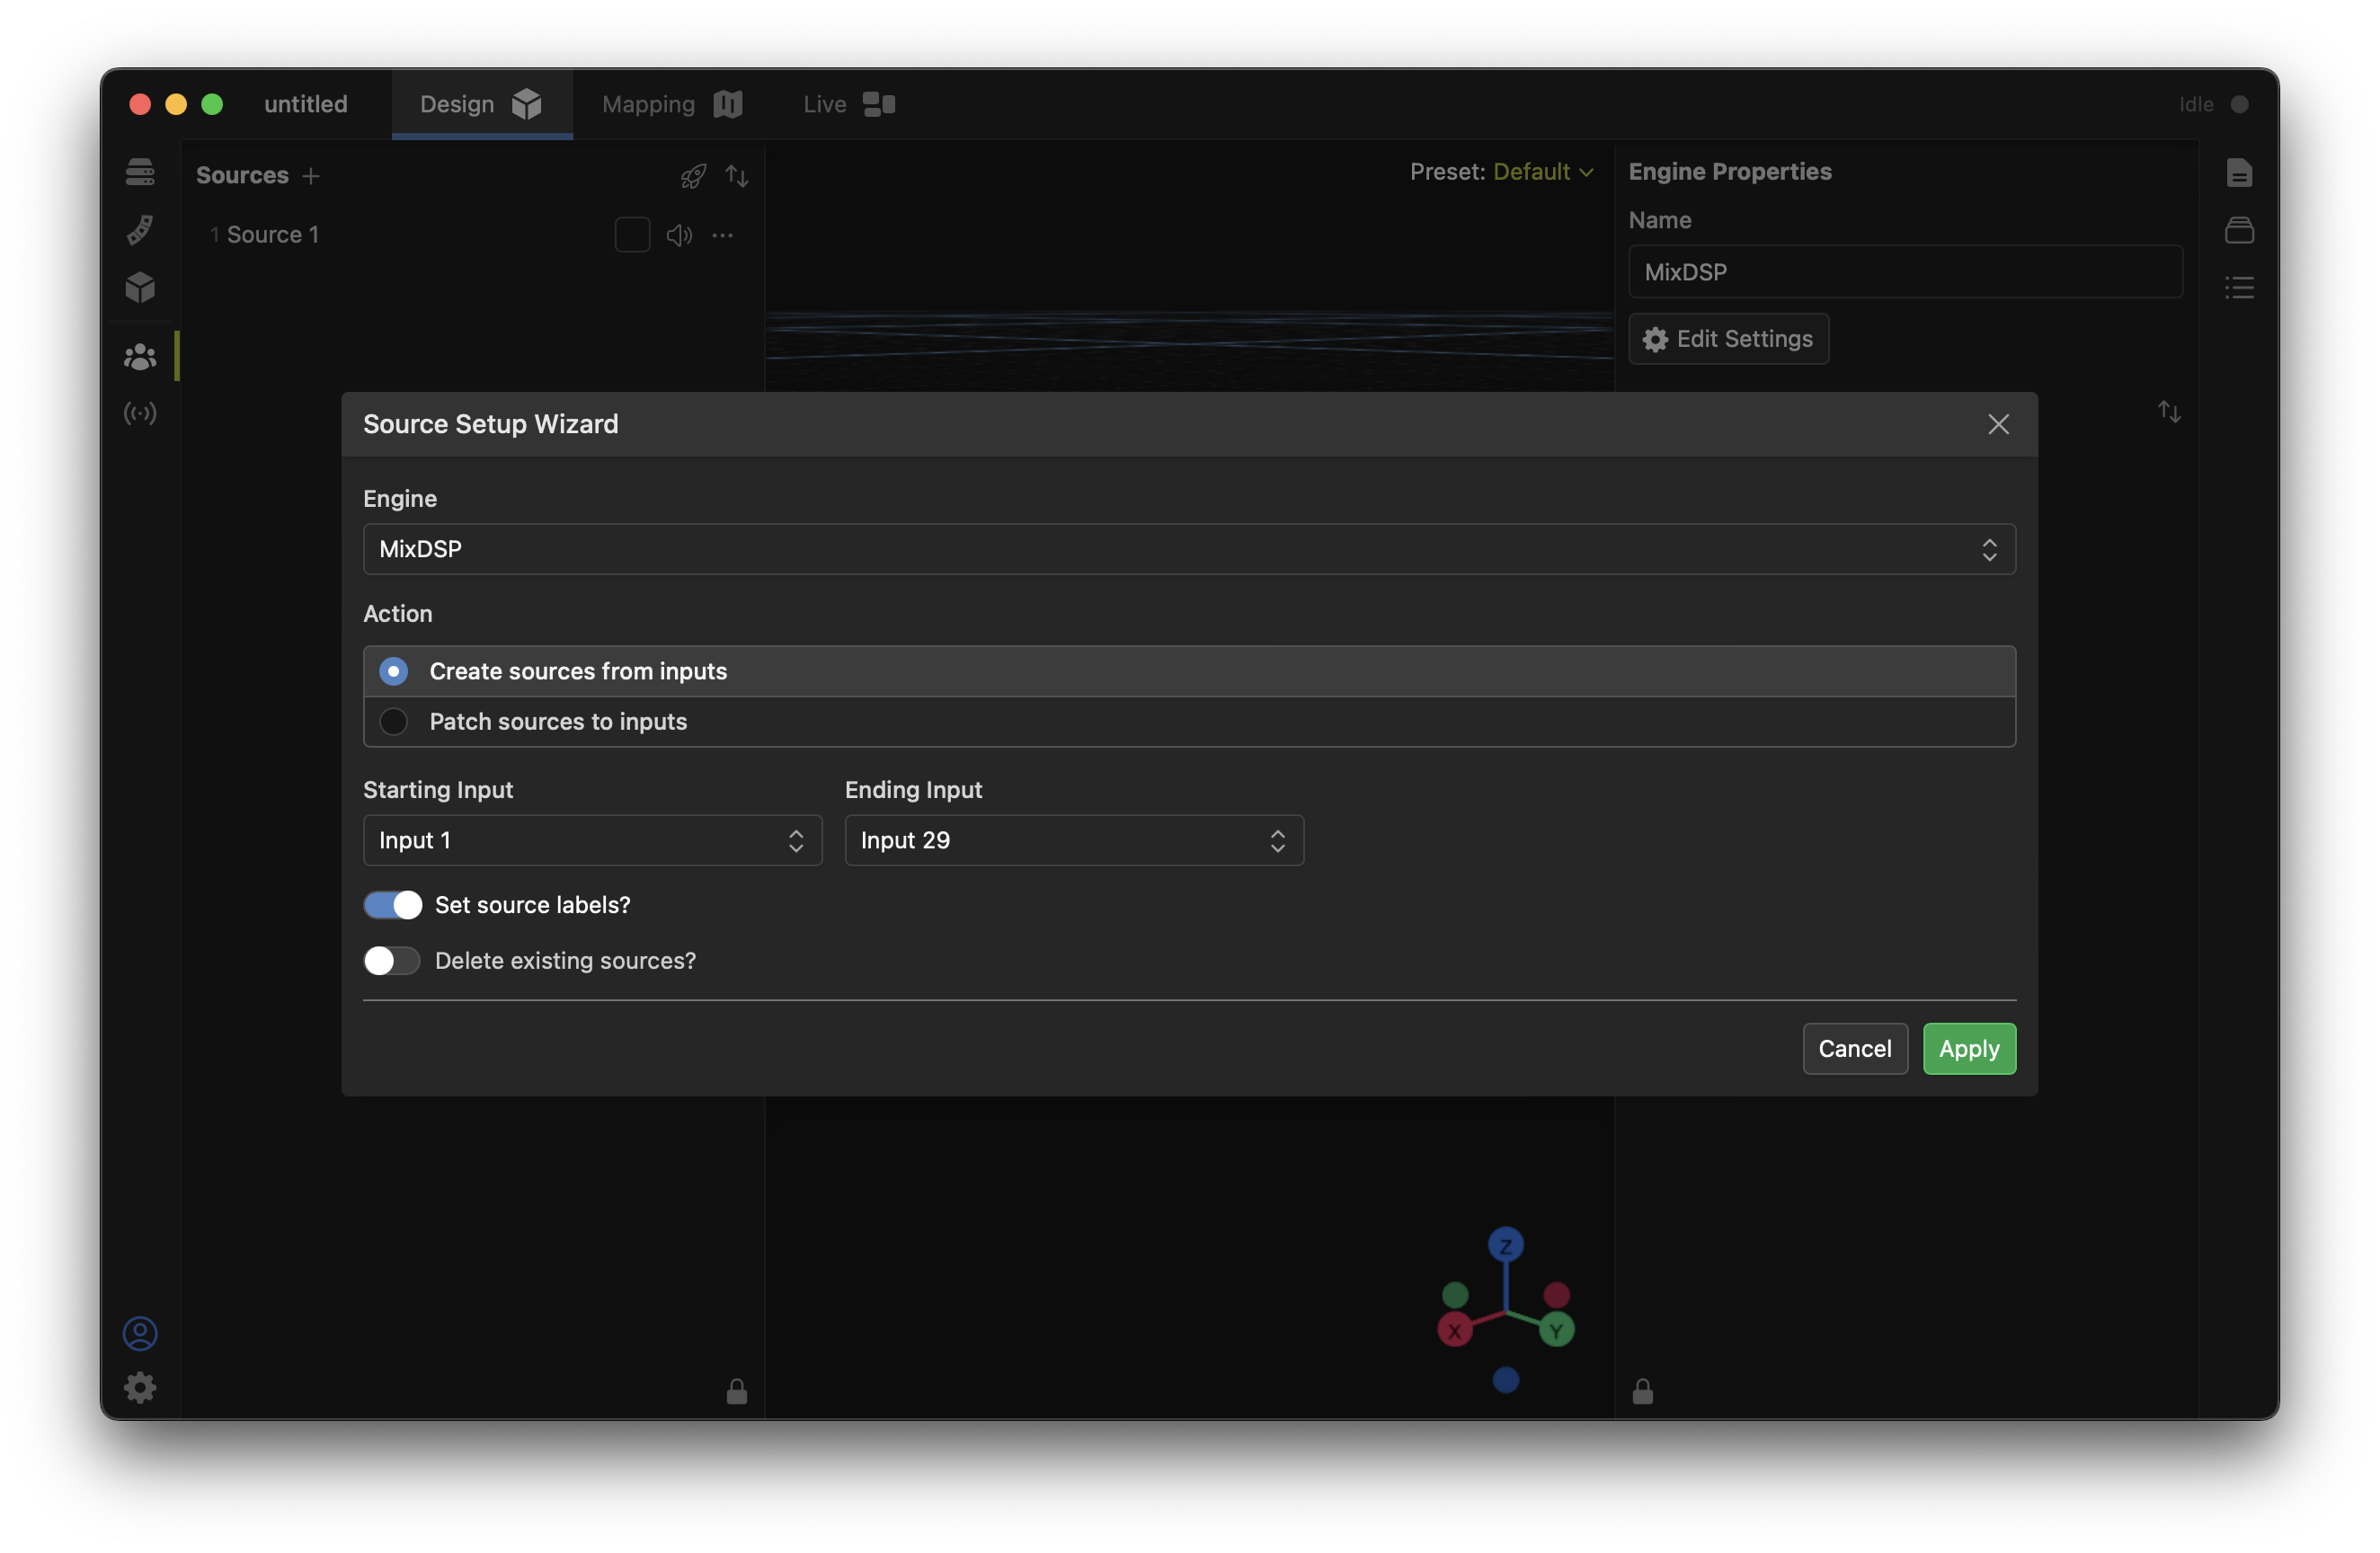
Once a source is created, it can be moved on the screen in the design view in 3D.
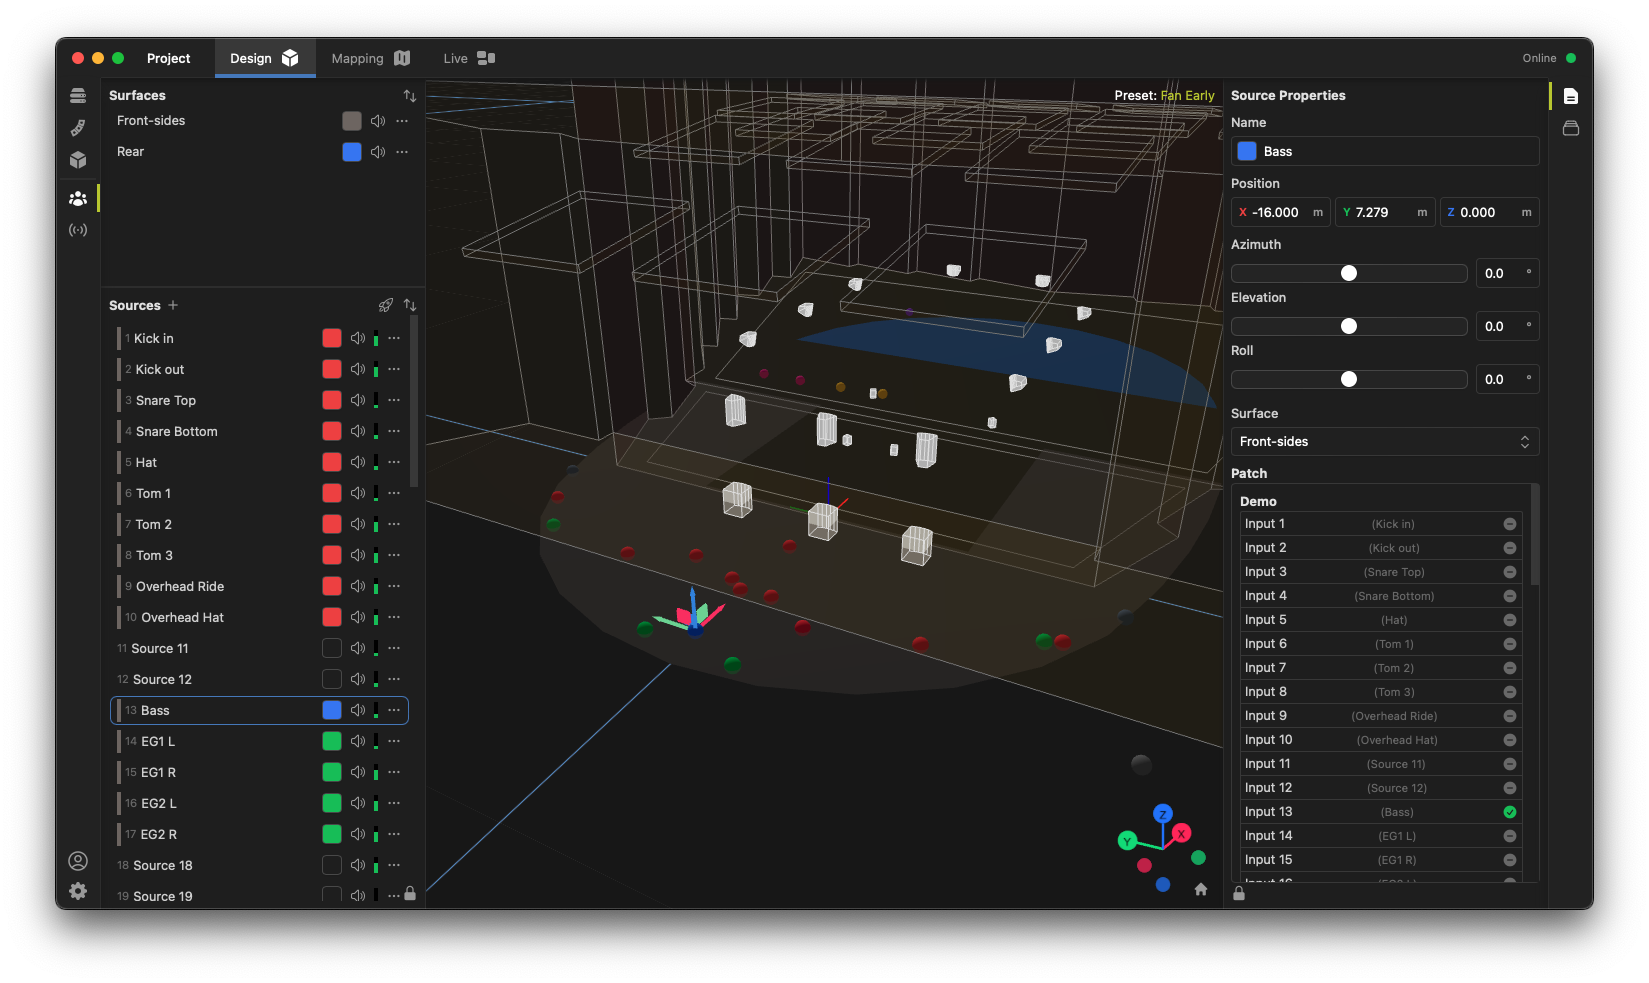
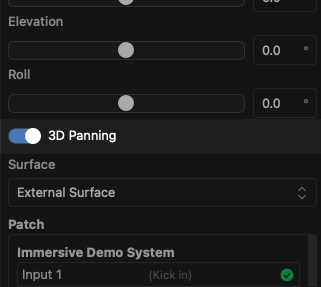
The rendering algorithm affecting each source may be modified using the 3D Panning option (default: off). When disabled, the Z axis is ignored, and sources are rendered in 2D space. This is typical for most lateral loudspeaker systems and for reinforcement applications and music mixing. When 3D Panning is enabled, the source is rendered in full 3D space, and height information is preserved. This can be useful for cinema, VR, or other applications where overhead speakers may be present. Note that each source may be configured separately. In a theatrical application for example, 2D panning can be used for music sources, while 3D panning is used for effects.
The Live Tab and Surfaces
Mixing surfaces are intended to make the process of positioning numerous sources in 3D space more ergonomic, especially with complex operations like a live mixing environment. Surfaces allow you to pre-define 2D planes where sources can be moved in real-time on the Live tab.
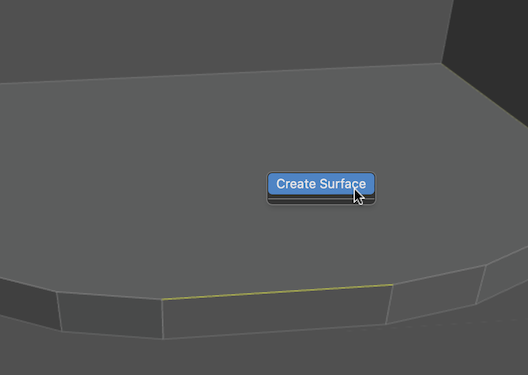
To create a surface, click on the Design tab then right-click any face in the project and select "Create Surface".
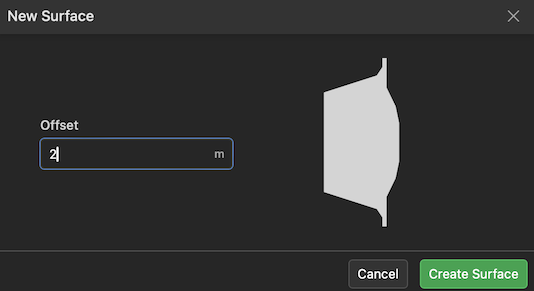
A dialog box will appear confirming your selection and requesting a desired offset distance. This can be used to create a location for OBM sources at a fixed distance from the surface. For example, enter a positive number to create a surface at a standing position relative to a stage floor, etc.
Once a surface has been created, a Surfaces list will appear in the Object Based Mixing toolbox, allowing management of its properties in 3D.

Next, switch to the Live tab.

On the Live screen, click the  button to enable editing of the live canvas. Next, choose your new surface from the Add Widget - Surface button menu:
 button to enable editing of the live canvas. Next, choose your new surface from the Add Widget - Surface button menu:
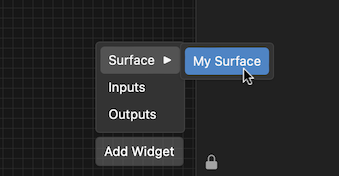
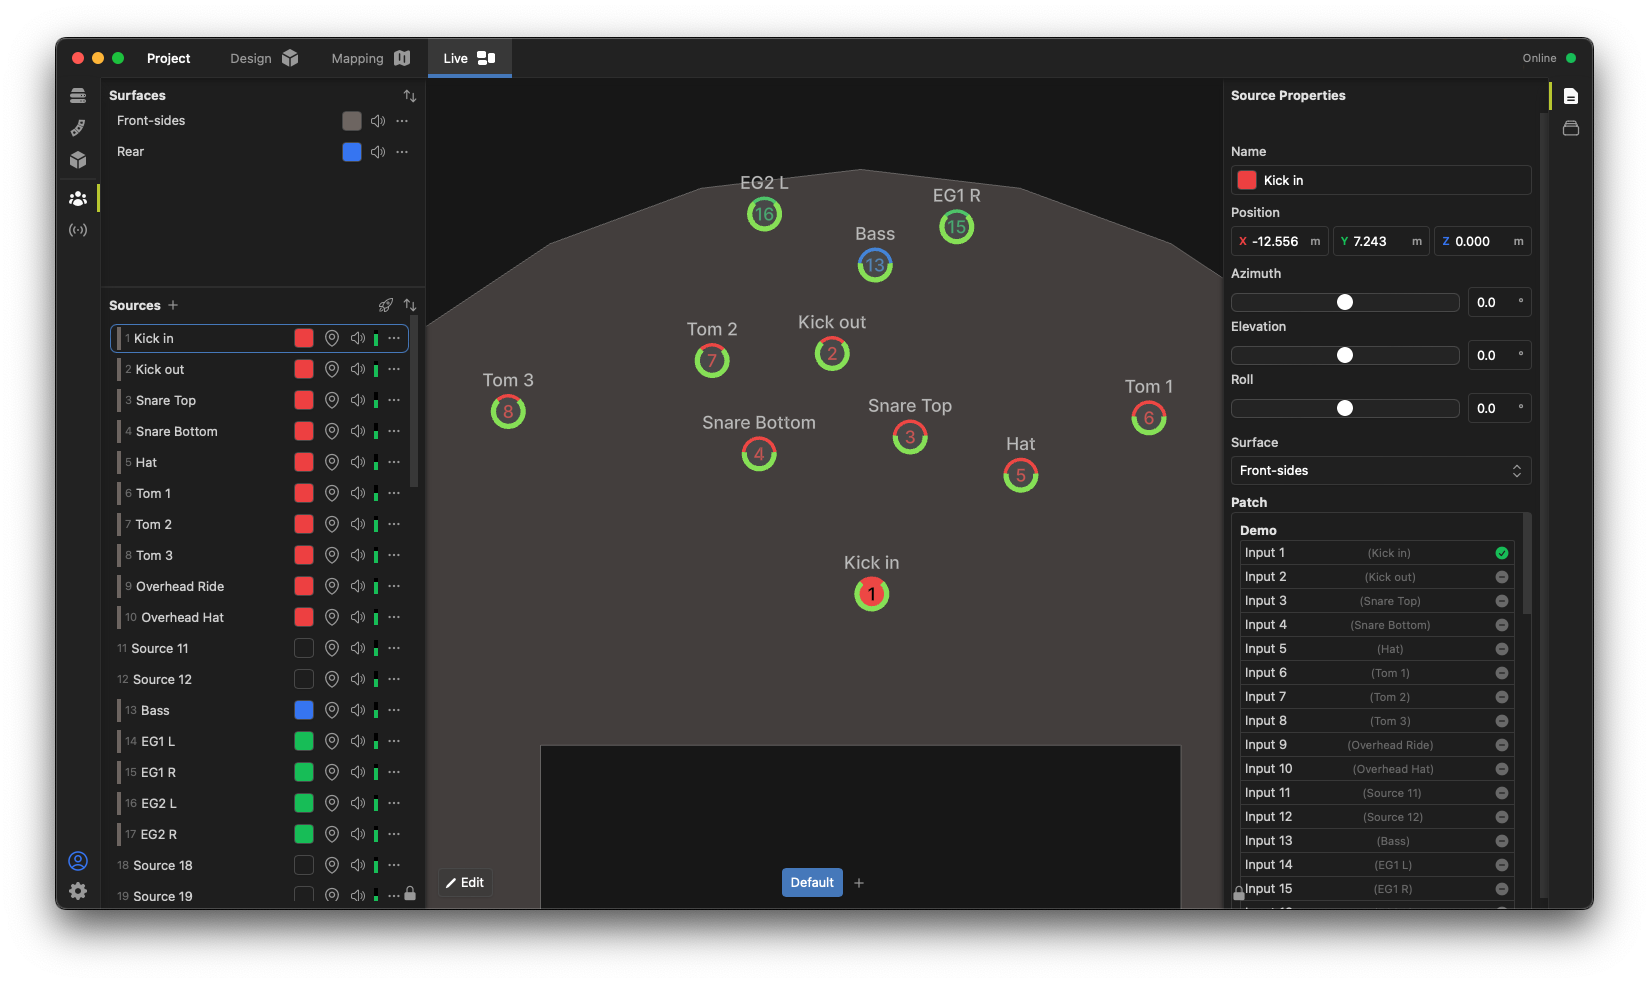
You can now place that surface on the Live screen and click "Done" to finish. Sources can now be added to that surface by clicking the  icon beside the source in the Sources list.
 icon beside the source in the Sources list.
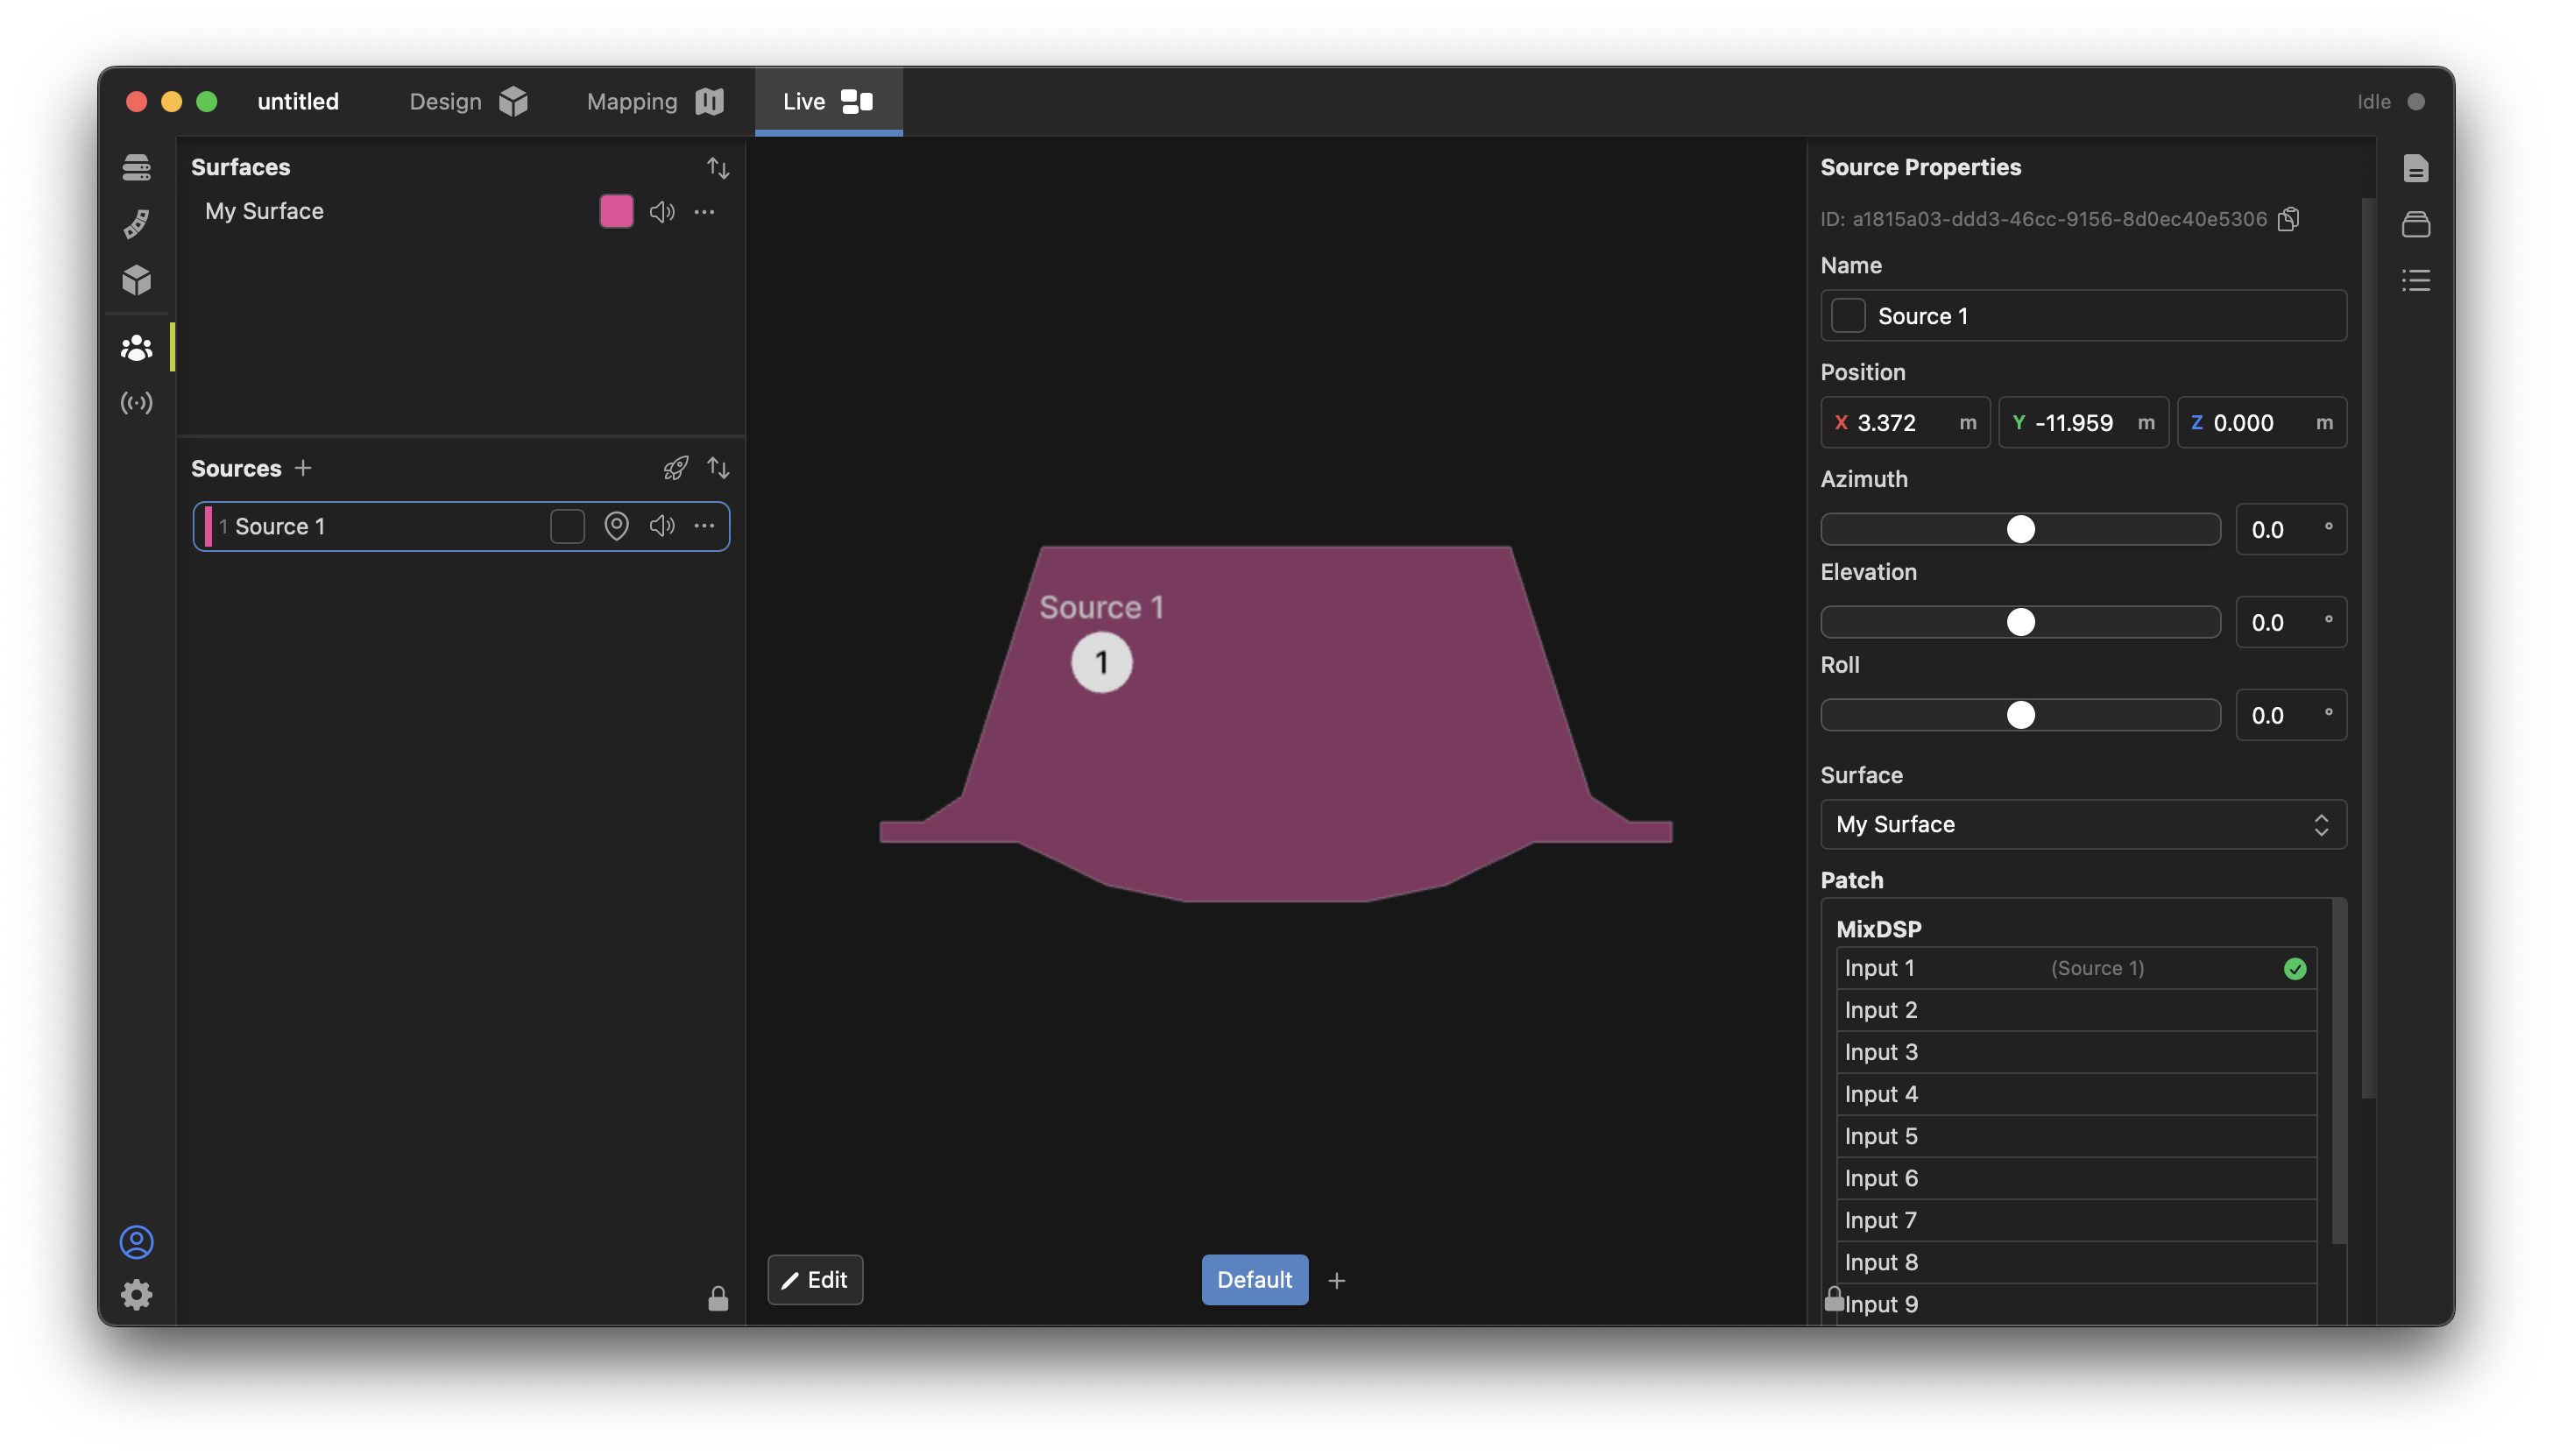
To aid in live control, sources and surfaces can be color-coded at will. In addition, during live operation with a processor, each source will show its signal level meter on the Live page, making it easier to find sources in a complex mix.
Source Levels and Mixing
Each source in the OBM system has a gain control that can be adjusted in the Properties toolbox, with an associated Mute button  . This control sets the level of the source in the mix and can be adjusted in real-time during operation or via automation or external control. This capability is useful when using the system without a mixing console or with smaller mixing consoles that may not support internal object-based mixing controls or snapshots.
 . This control sets the level of the source in the mix and can be adjusted in real-time during operation or via
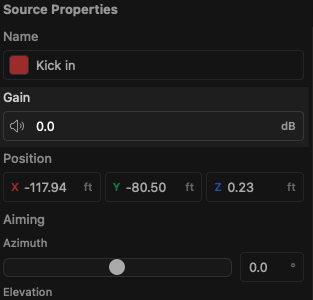
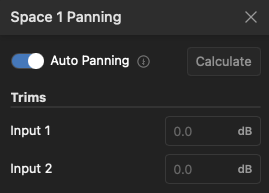
In addition, the source can be assigned to one or more active acoustics spaces, which will control the source's level contribution to those spaces. At the bottom of the Properties toolbox, select the Space Sends tab to view and adjust the source's contribution to each active space. These levels may also be dynamically controlled via automation or external control.
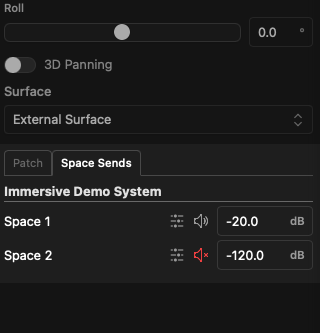
Panning options for each source are available by clicking the  icon on each send. By default, the Auto Panning feature is enabled which automatically varies the sends to each space emitter channel based on the source position and movement. This is useful for most applications but can be disabled for manual control. When Auto Panning is disabled, you may enter trim levels directly into each input channel, or click the Calculate button for a one-shot automatic calculation that does not vary in real time as the source moves.
 icon on each send. By default, the Auto Panning feature is enabled which automatically varies the sends to each space emitter channel based on the source position and movement. This is useful for most applications but can be disabled for manual control. When Auto Panning is disabled, you may enter trim levels directly into each input channel, or click the Calculate button for a one-shot automatic calculation that does not vary in real time as the source moves.